Airtable automations and webhooks
If you’ve been hanging around SaaS apps and their APIs over the last few years, you’ve probably heard the term “webhook” being banded about by those smart developer types 😉. But what is a webhook? Let’s use a real life scenario to illustrate.
Let’s say I’ve got a Shopify website to display my widgets and take orders from my customers and I’ve got an Airtable base that holds all of my orders and allows me to make and dispatch my widgets. My Airtable base is my fulfilment engine and needs to know about the orders I’ve taken. There’s essentially two ways I can get the Shopify order data into Airtable:
- I can set up a script in Airtable (or somewhere else) that polls the Shopify API every 10 mins for new orders
- Or I can set up a webhook in Shopify that sends the data to Airtable when an event occurs (when a customer places an order for example)
One is a “pull” and the other is a “push”. There’s something nice about webhooks because they are initiated by the app that knows about the event. With the polling method, I have no idea how many orders I might get when I run every 10 minutes - it could be 1, 10, 100, or, most of time, zero. There’s a certain efficiency about webhooks.
One of the new features in Airtable Automations is the ability to accept a webhook post from another app and capture the data that this app is going to send to us. In the rest of this post, I’ll show how Airtable is set up to receive a webhook and use that data in an automation.
We’ll use Postman to play the part of the sending app. (Postman needs a tutorial series in its own right, so I won’t labour this point. But don’t worry about this part if it isn’t clear, we’re really focused on the Airtable end).
Our base is set up like this:
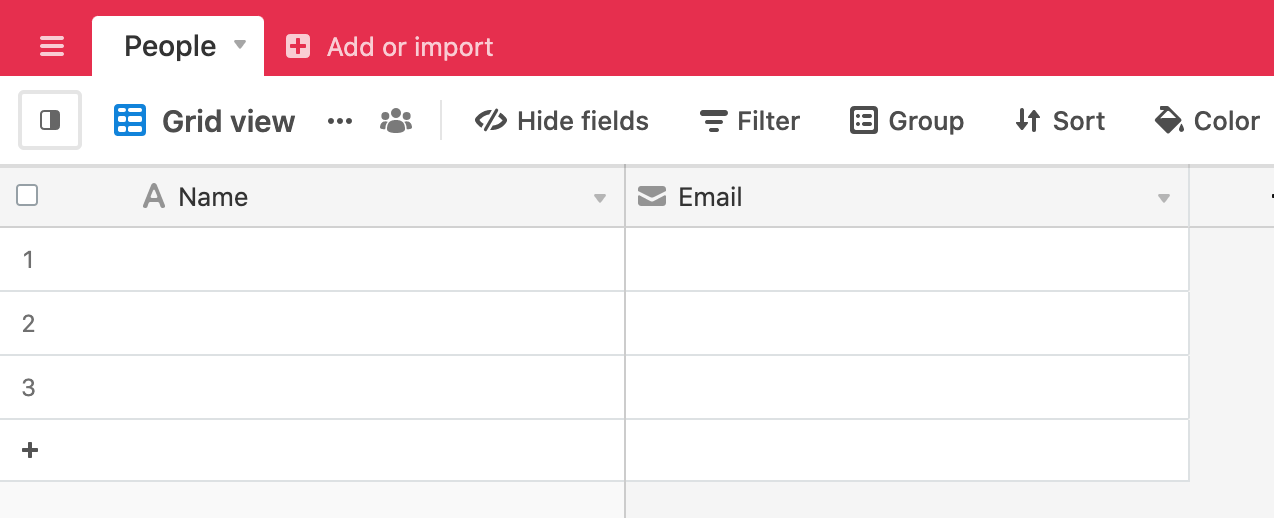
Our scenario is that we’re receiving a webhook from our CRM system - when a new customer is created in CRM is sends a webhook to our base and we populate our table from this.
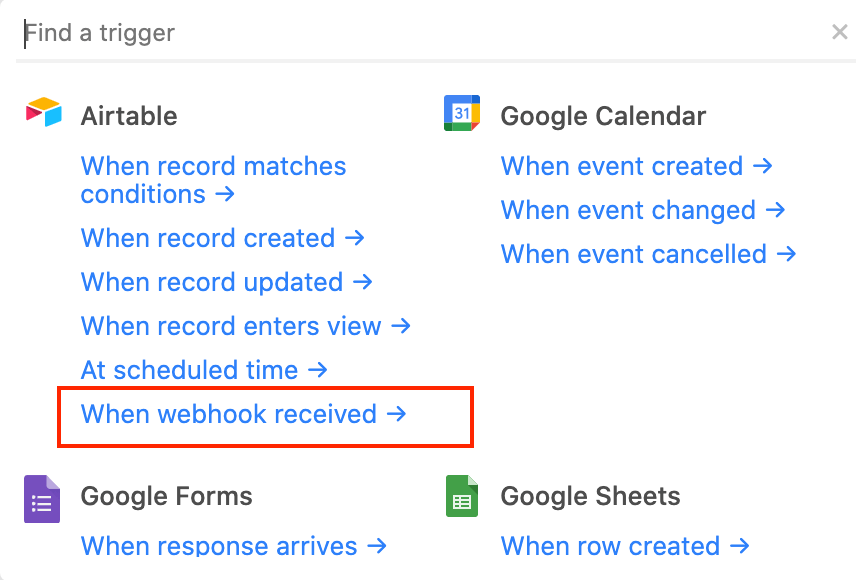
Go to the Automations panel, create a new Automation and click on “Choose a trigger”. Select “When webhook received” from the list:
Airtable gives us a webhook url we can use:
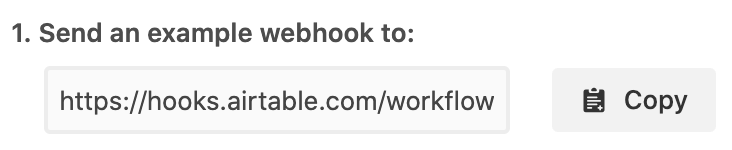
Before we can test this in Airtable, we have to actually make a request to this url. To find out how to do this for your sending app, have a look at their documentation. Googling “test webhook for AppX” should point you in the right direction.
I’m using Postman to simulate my sending app. Here’s the request I’m sending to Airtable:
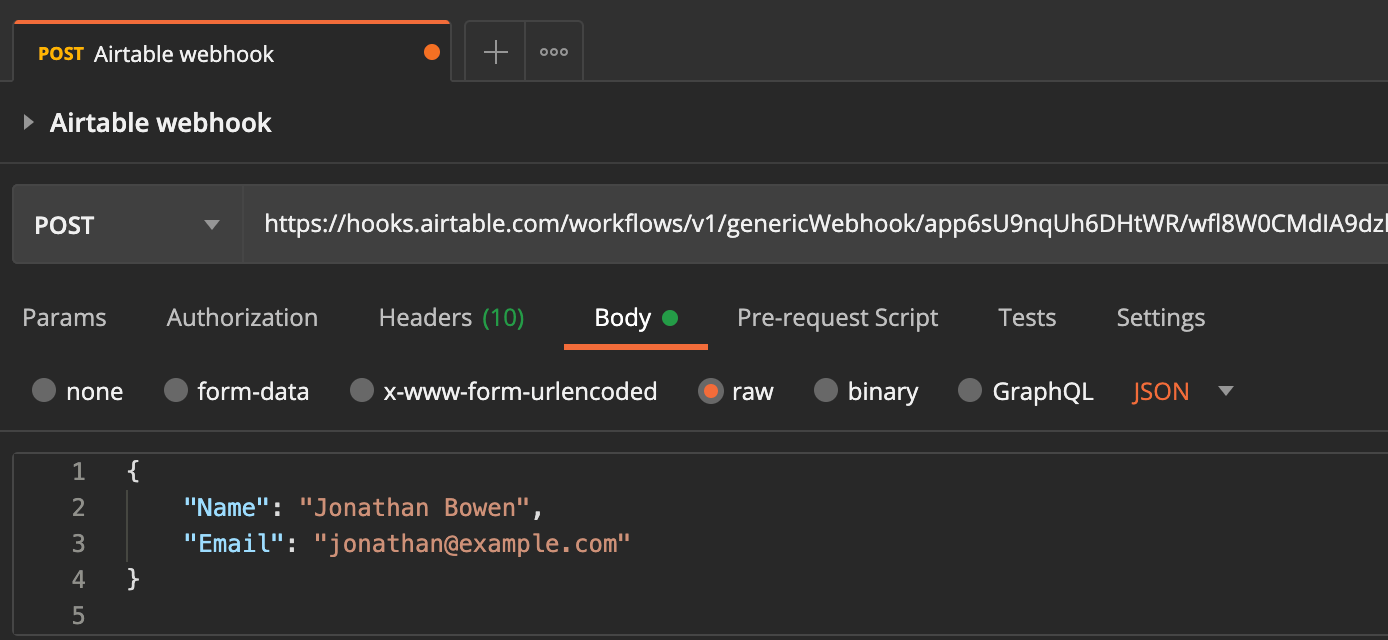
Points to note:
- It is a
POSTrequest - I’ve added a
bodywith some JSON data
If I run “Test” on the automation now, Airtable will get the request I’ve made and the data within in, parse the data and make the JSON attributes available to be used in the rest of the automation:
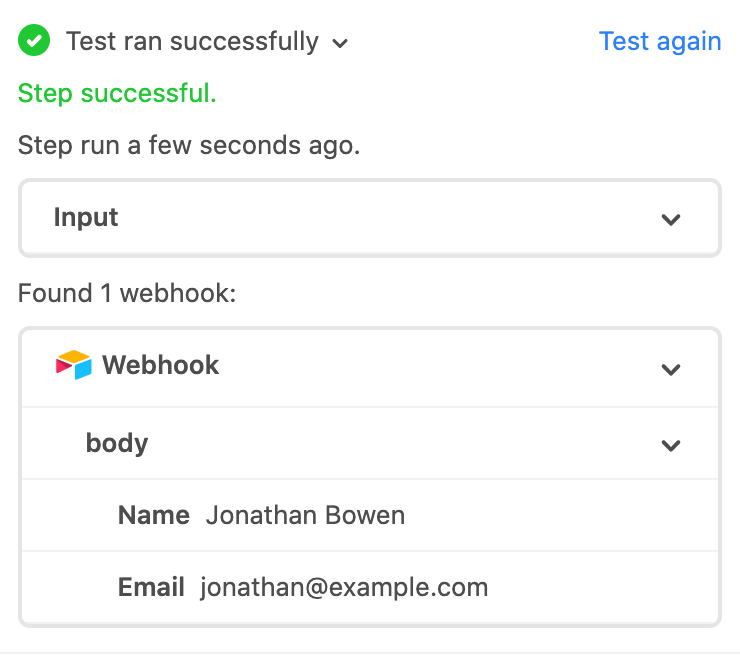
Click on “Done” and the select “Add action”. Choose “Create record” from the list of actions.
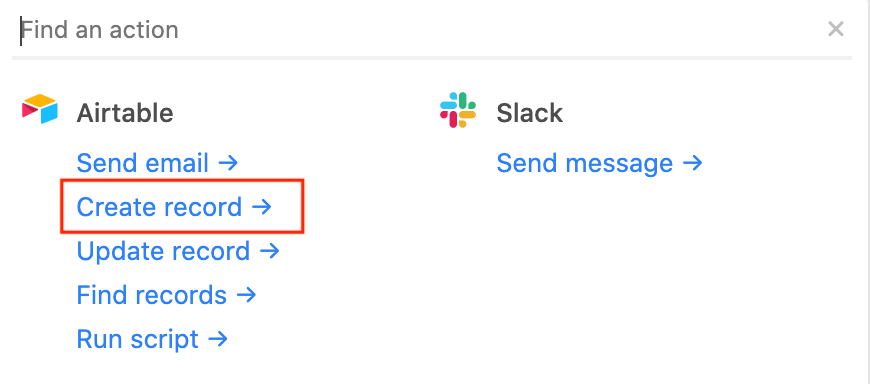
Select the table you want to create records in, then click on “Choose field”, in our case, selecting “Name” as the first field. You can then click on the “+” button to find the name value from the inbound webhook. Add another field for Email and follow the same process to add the email from step 1 to this field.
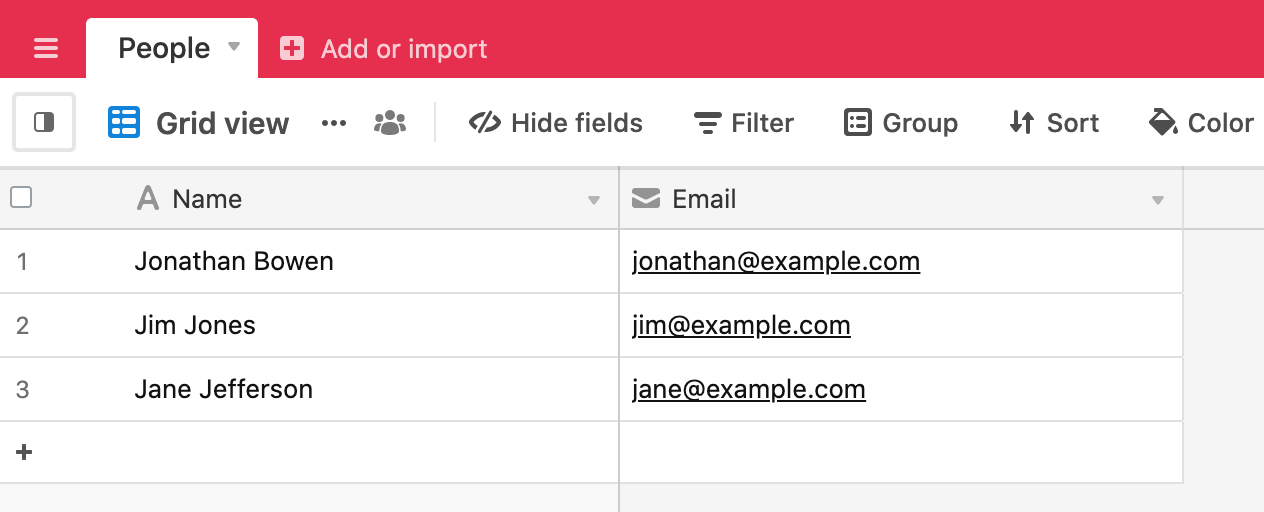
Click on “Test” and the values from the webhook should appear in your table.

I can now turn the automation on and see the webhooks coming in as I post them from Postman.
Now all we need is for Airtable to be able to post to a webhook in another app when something happens in Airtable. Got to be on the roadmap, right?