Sending an email using SendGrid (APIs Part 3)
Airtable has a built-in SendGrid app and this is great for sending emails to your users/customers/whatever. But for a little more control and configurability (and to continue our API series), in this post we’re going to use the Airtable scripting block to communicate directly with SendGrid.
Airtable Setup
Let’s start with our base:
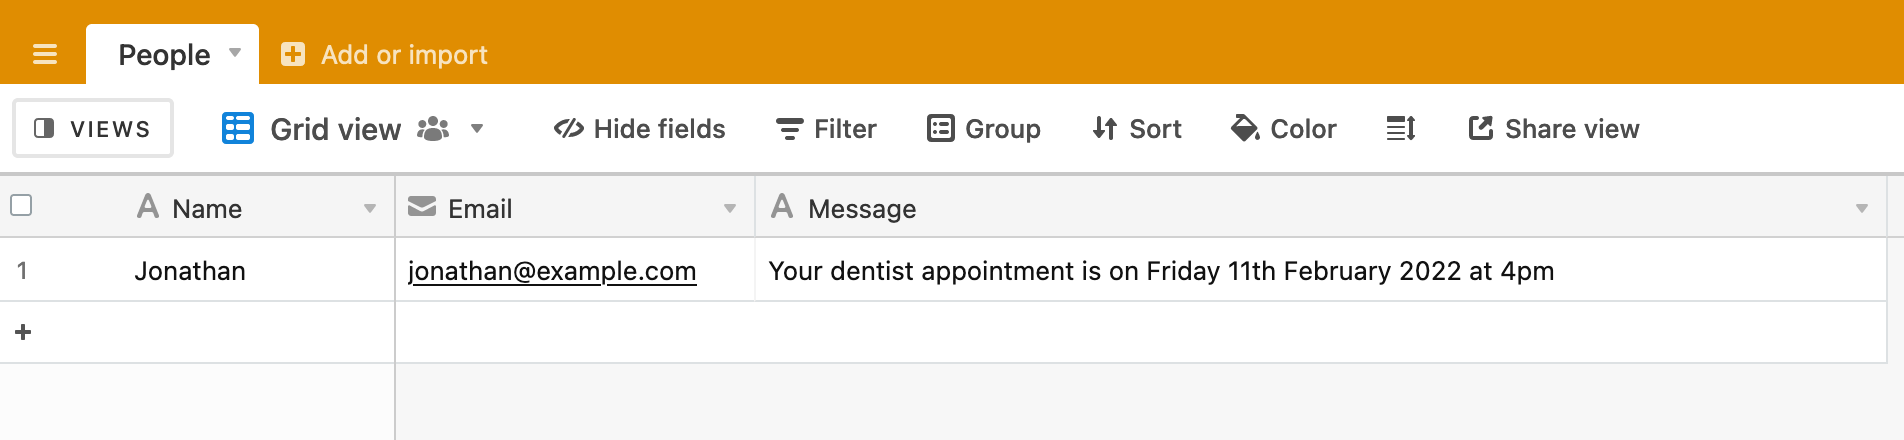
Our table has the following fields:
- Name - for the name of our email recipient
- Email - the email we’re going to send to
- Message - the message we want to send to the recipient
SendGrid Setup
If you don’t already have a SendGrid account, set one up now. There’s few hurdles you have to jump before you are ready to send, such as adding your address details and verifying a sender email address. I won’t cover the set up of your account, but it is pretty straightforward and SendGrid leads you through the process.
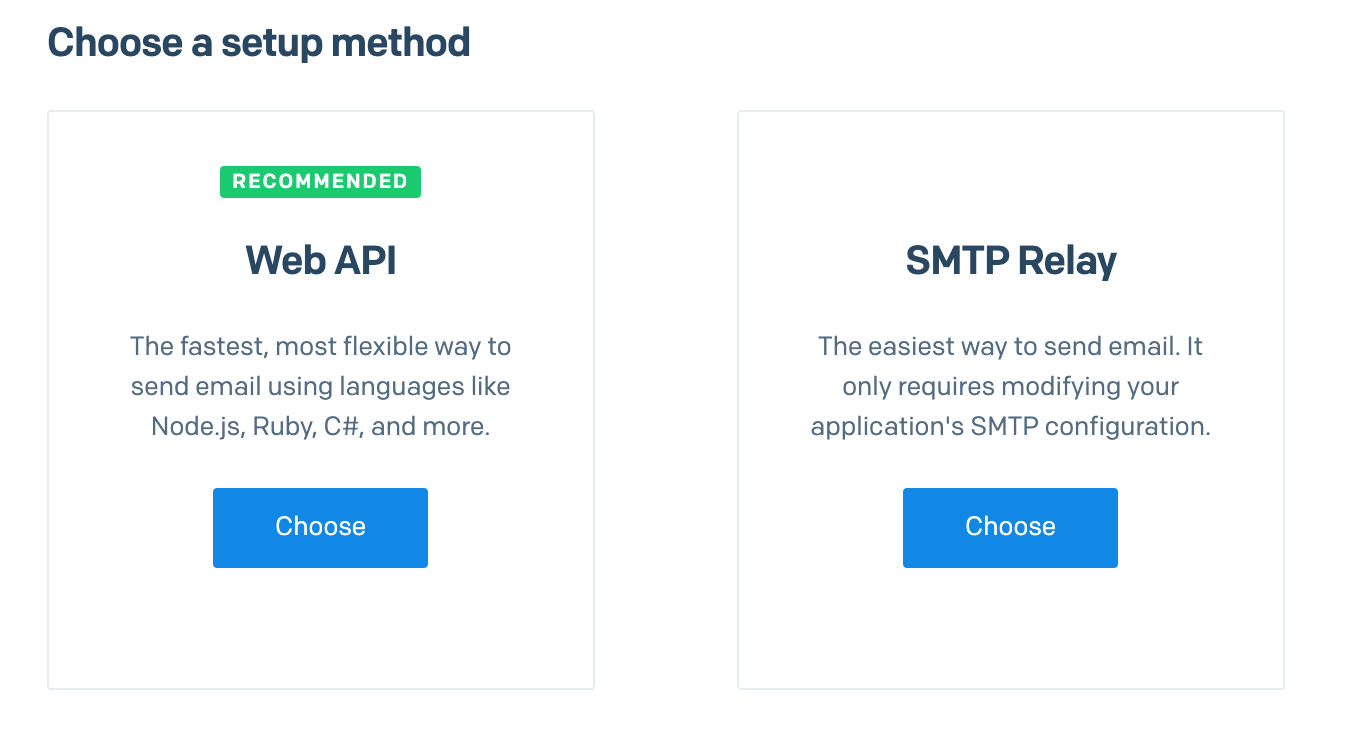
Once your account is ready to send, click on ‘Email API’, then ‘Integration Guide’. You should see two options for the setup method - Web API and SMTP Relay. We’ll use Web API.
You’ll now see a set of language options to choose from. We’re using vanilla Javascript in the Scripting app and none of the language options presented will be useful to us here (most assume the use of a SendGrid library or package to make the integration easier in your chosen language). This is a common hurdle to get over when you are presented with new API docs. What do we do here?
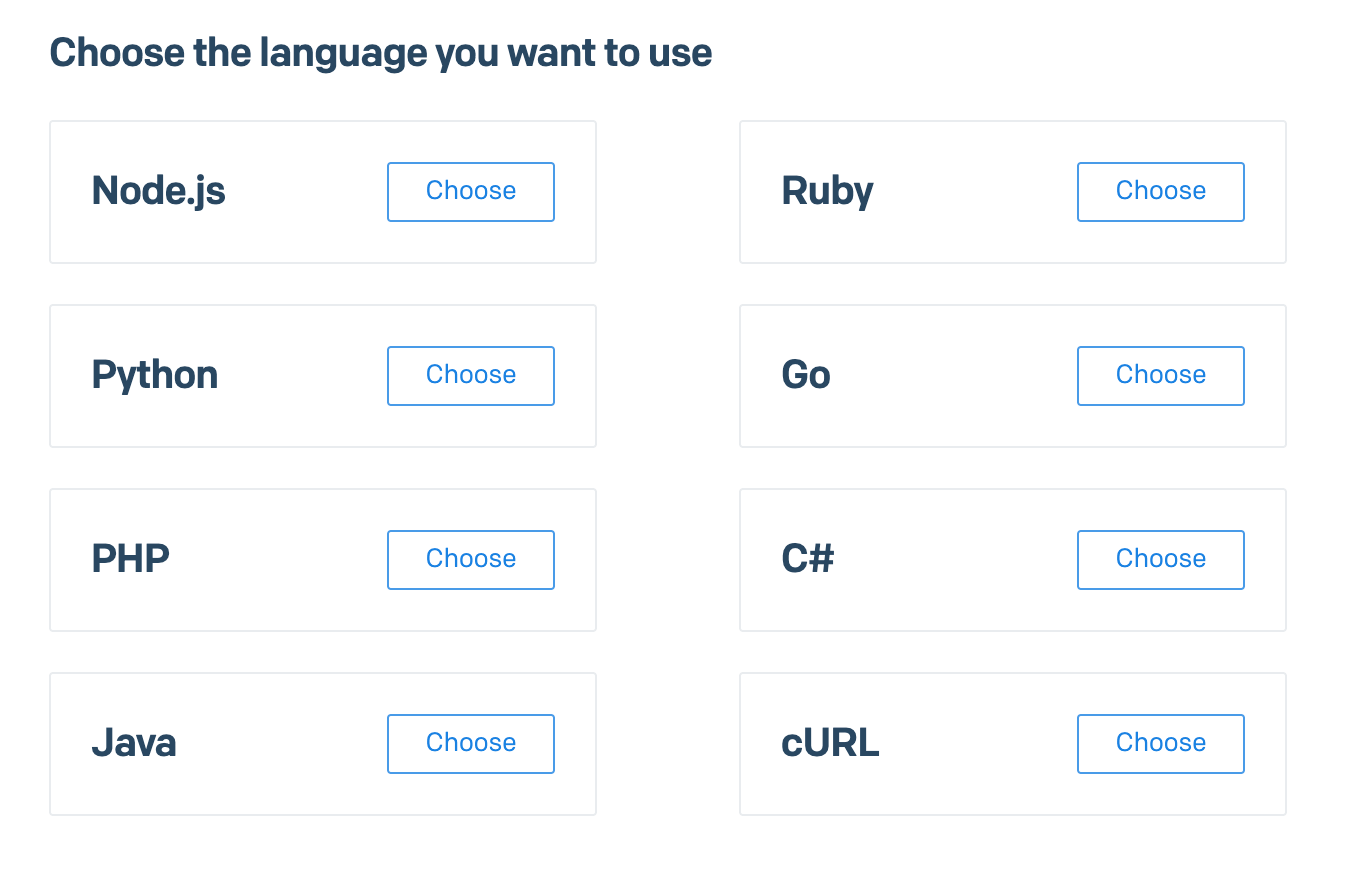
cURL is a command line tool for making data transfer requests and it is easy to translate from a cURL request to a JavaScript request, so let’s start there. More information on cURL here if you are interested. Click on the cURL option to see the recommended steps and generated code.
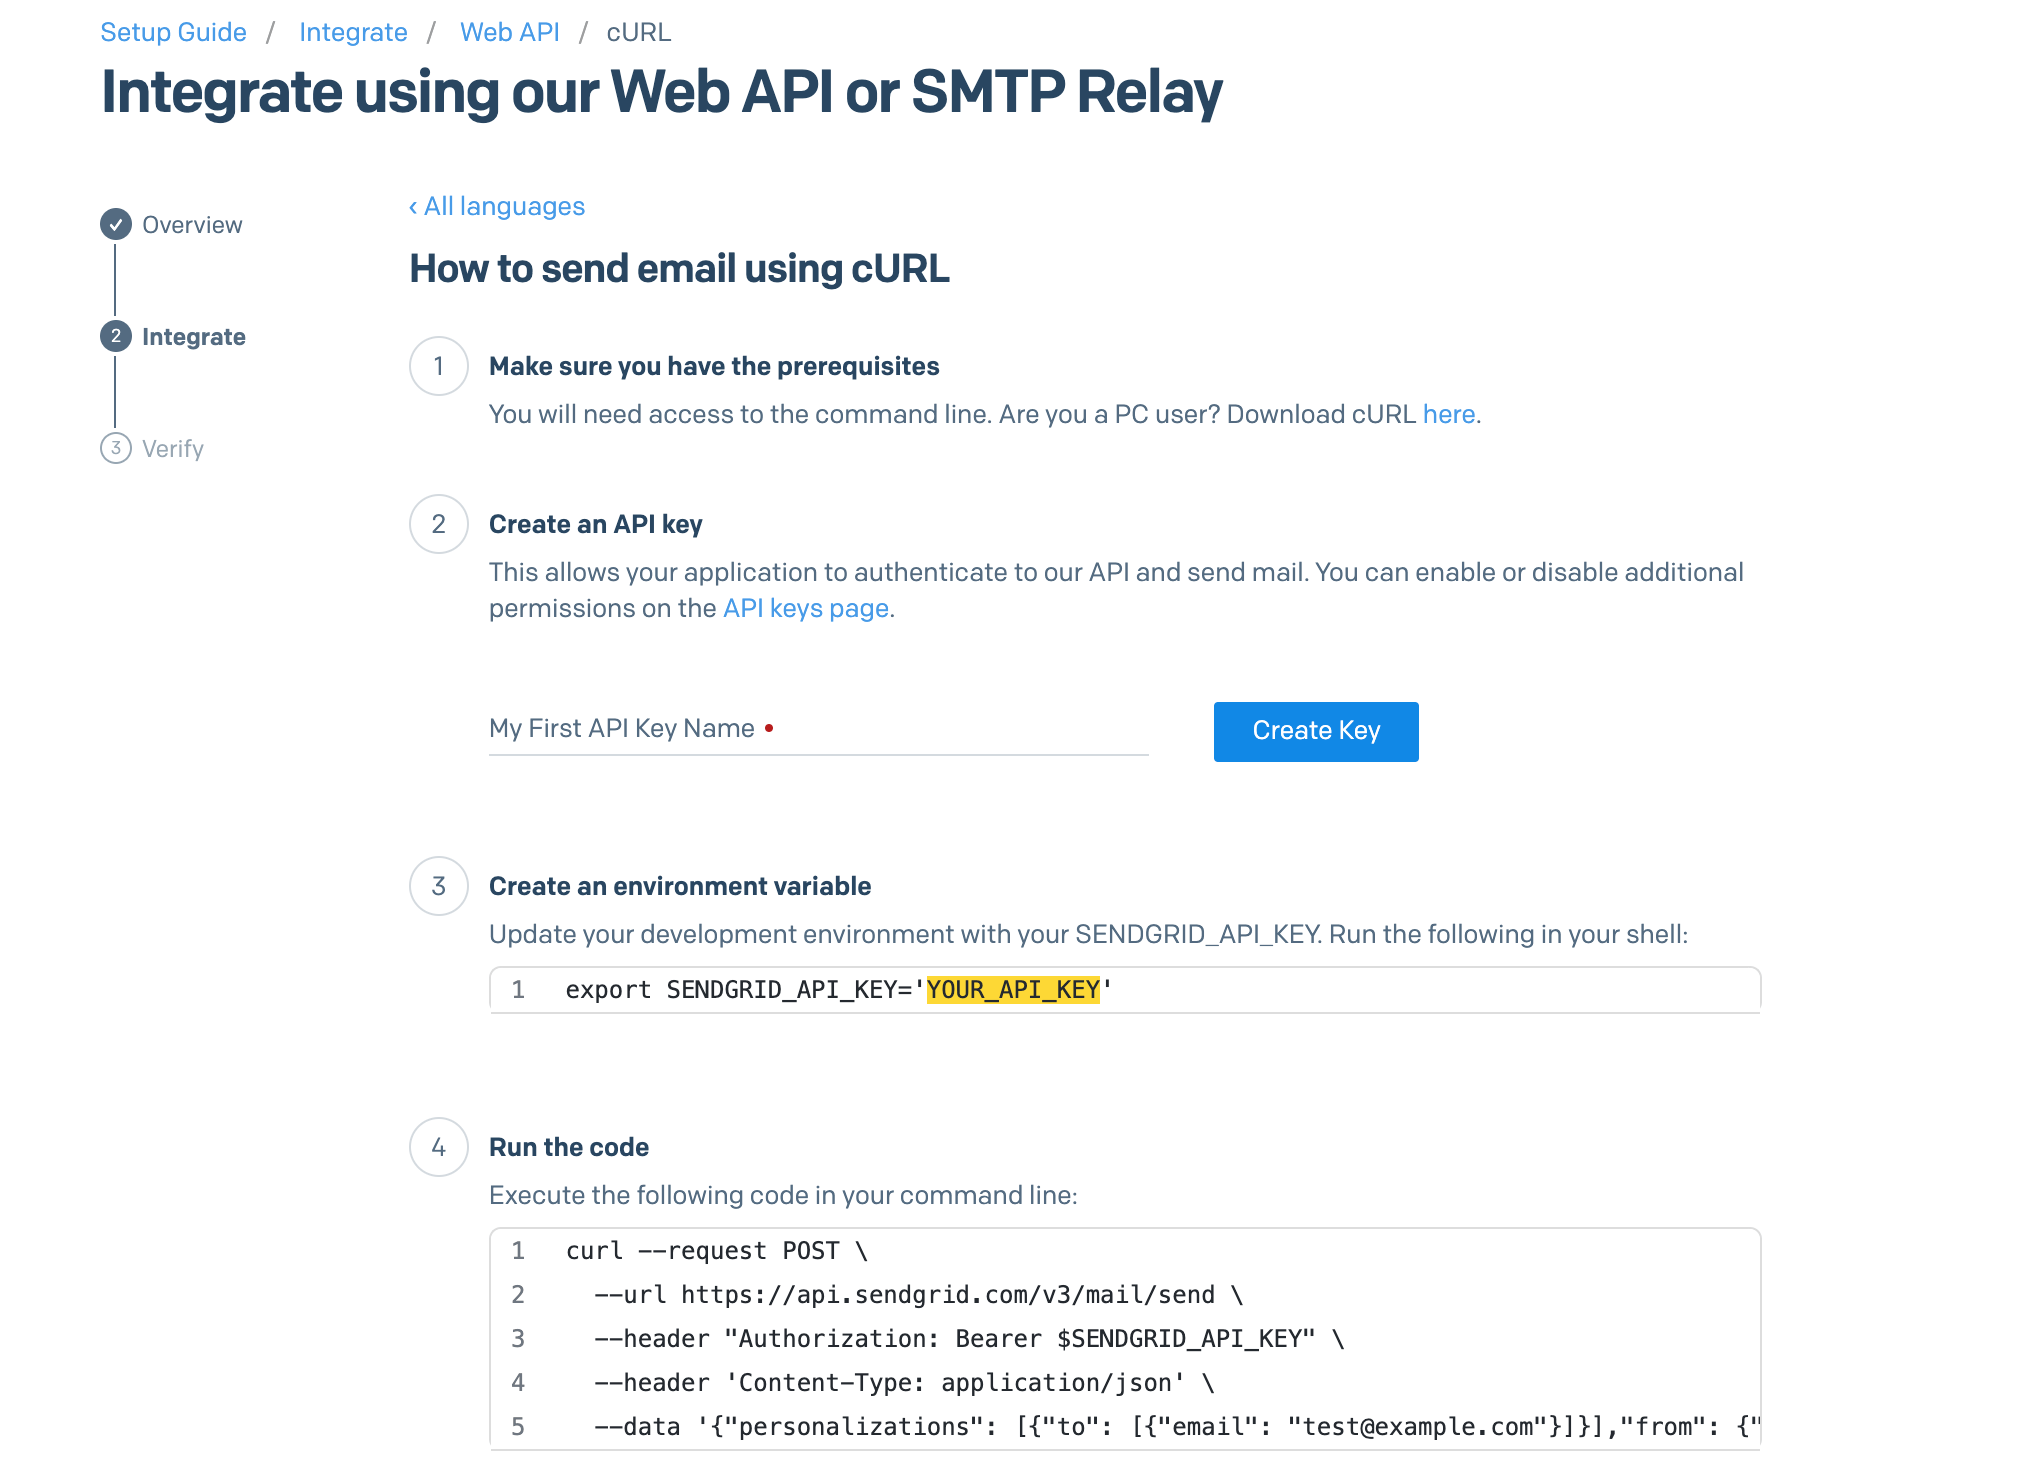
We’re not going to use cURL directly, so you can ignore step 1 of the instructions. Step 2 tells you to create an API key if you don’t already have one. Take a moment to do that and note the API key generated. Ignore step 3 and copy the code in step 4.
Airtable Script
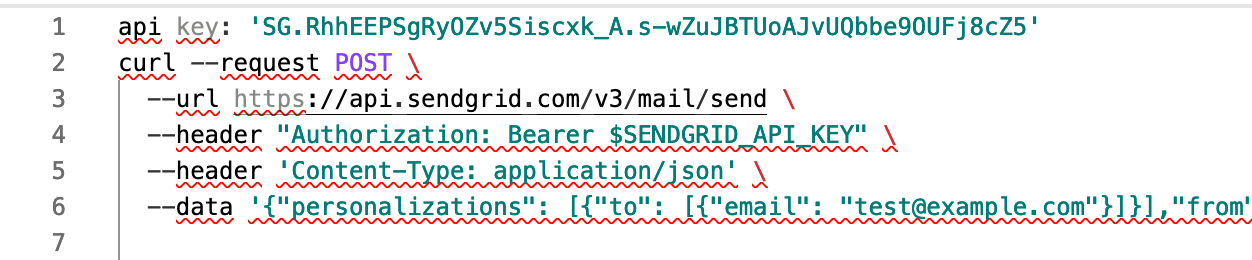
Now let’s add the scripting app to our base and start to develop the script that will send an email when we select a specific record. Clear the boilerplate code and copy in your API key and the copied cURL command.
We can convert this into JavaScript that will work with the scripting app.
Let’s start by pulling out some of the cURL command elements into variables.
let SG_API = 'SG.RhhEEPSgRyOZv5Siscxk_A.s-wZuJBTUoAJvUQbbe9OUFj8cZ5'
let SG_URL = 'https://api.sendgrid.com/v3/mail/send'

let data = {
    'personalizations': [
        {'to': [{'email': 'test@example.com'}]}
    ],
    'from': {'email': 'test@example.com'},
    'subject': 'Sending with SendGrid is Fun',
    'content': [
        {'type': 'text/plain', 'value': 'and easy to do anywhere, even with cURL'}
    ]
}

let options = {
    method: 'POST',
    headers: {
        'Content-Type': 'application/json',
        'Authorization': 'Bearer ' + SG_API
    },
    body: JSON.stringify(data)
}
In the above script snippet, I’ve declared variables for the API key and the API endpoint/URL we’re going to use. I’ve declared a data variable to hold the basic SendGrid message. I’ve also created an options variable which gets passed to the fetch command (see below) when the API call is made. options contains the fetch method (in this case a POST request), the headers required and the body of the request. Note that the API key variable is used in the Authorization header and data is used in the body attribute of the options object.
Let’s now make a simple API call to check that our code is working and that SendGrid is set up correctly. Change the to email value in the data object to be a real email address and add a fetch call to the bottom of the script:
let response = await fetch(SG_URL, options)
Now run the script.
You should get an error 😟. We’ve used fetch in other API scripts, so what’s happening here? The error you should see is:
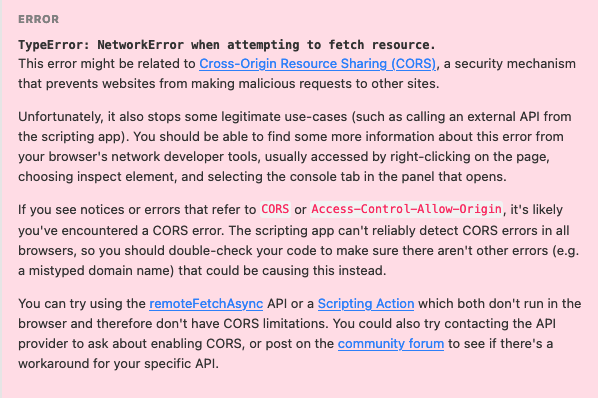
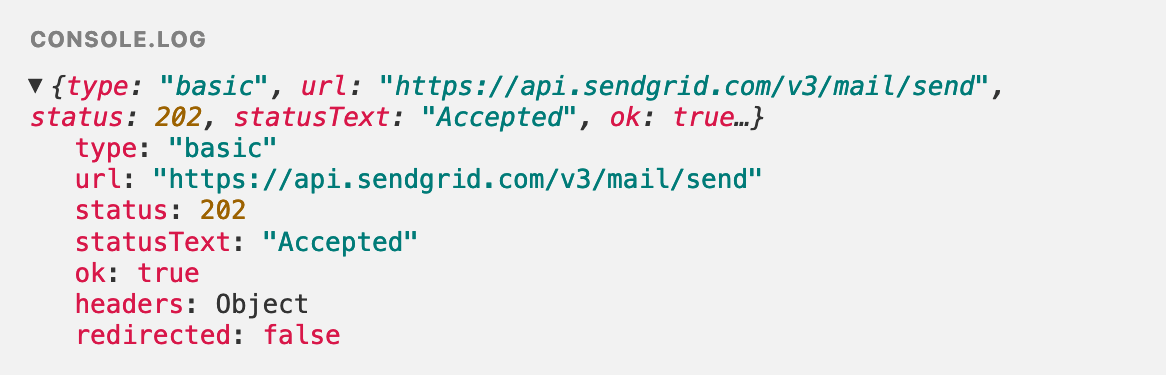
When an Airtable script runs, it runs from the user’s browser and some API endpoints don’t allow this for security reasons. (More details on CORS here). To get around this, the team at Airtable have implemented a remoteFetchAsync method, which executes the API call from the Airtable servers rather than from your browser, which gets around any CORS issues. Change the API call to use remoteFetchAsync and log the response:
let response = await remoteFetchAsync(SG_URL, options)
console.log(response)
You should see a 202 status in the response:
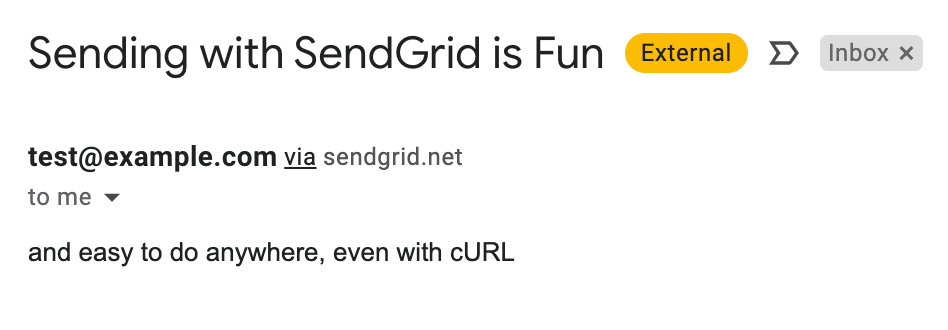
And, more satisfyingly, you should get an email in your inbox:
Now that we have the basic process working, we can modify the script to use our Airtable data and send a more personalised email. Change your script to this:
let SG_API = 'SG.RhhEEPSgRyOZv5Siscxk_A.s-wZuJBTUoAJvUQbbe9OUFj8cZ5'
let SG_URL = 'https://api.sendgrid.com/v3/mail/send'

// define a table
let table = base.getTable('People');
// and get the user to choose a record from the table
let record = await input.recordAsync('Pick a record', table);
// if there is a record...
if (record) {
    // get the name, email and message values from the record
    let name = record.getCellValue('Name')
    let email = record.getCellValue('Email')
    let message = record.getCellValue('Message')

    console.log(name, email)

    // now set some of the values in the data object with the record values
    let data = {
        'personalizations': [
            {
            'to': [
                {
                'email': email
                }
            ]
            }
        ],
        'from': {
            'email': 'test@example.com'
        },
        'subject': '👋 Hi ' + name,
        'content': [
            {
            'type': 'text/plain',
            'value': message
            }
        ]
    }

    let options = {
        method: 'POST',
        headers: {
            'Content-Type': 'application/json',
            'Authorization': 'Bearer ' + SG_API
        },
        body: JSON.stringify(data)
    }

    // call the SendGrid API as before
    let response = await remoteFetchAsync(SG_URL, options)
    console.log(response)
}
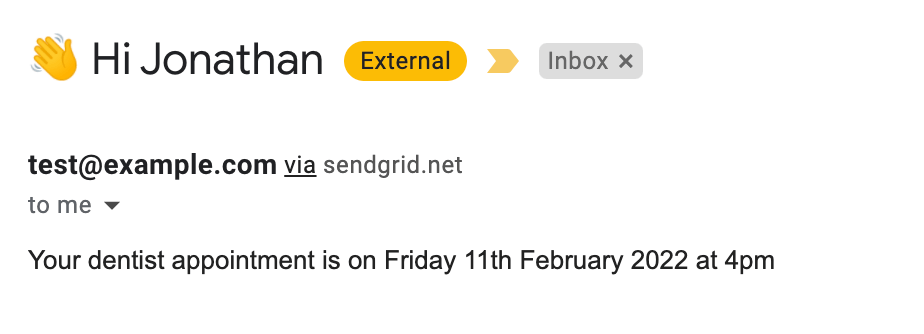
Note that the ‘to’ email address is set to the email variable; the subject is personalised to include name; the content value is set to the message.
Run your script again, choosing one of the records in your table. You should get the personalised email:
This is a very basic example of the kind of email notification you can send through SendGrid. Have a look at the API docs to see how you can further customise your email - ‘from’ and ‘to’ names (to go with email addresses), HTML content (not just plain text), attachments, dynamic templates, cc and bcc emails are just some of the elements that can be set in your API call.
Remember to keep your API key secret so that others cannot send emails through your account 😀. The API keys in the scripts above have been modifed, so won’t work with SendGrid.
See APIs Part 1 and APIs Part 2 for more in this series.