REST APIs and Airtable (APIs Part 2)
In part 1 we looked at how to get data from an API and create records in Airtable using a GET request. In this post, we’re going to go in the opposite direction and POST some Airtable data to an API.
For this example, we’re going to send data from Airtable to Trello. Like Airtable and many other web apps, Trello uses the REST API pattern.
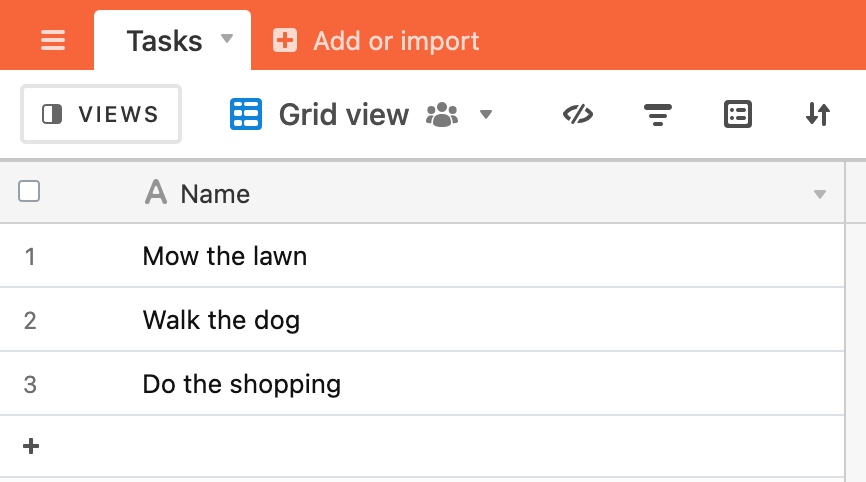
Let’s start on the Airtable side. We have a “Tasks” table containing a number of tasks and we want to send these to Trello, each task becoming a card on a Trello board.
We’ll begin our script by query our Tasks table and logging the task name to the console.
let tasksT = base.getTable('Tasks')
let tasksQ = await tasksT.selectRecordsAsync({
    fields: ['Name']
})
for (let task of tasksQ.records) {
    console.log(task.name)
}
If we run the script we can see the task name in the console panel.
In our for loop, on each iteration, we want to create a new card in Trello using the Airtable task name as the Trello card title. To understand how we do this, we need to look at the Trello API documentation. All web app APIs will have some form of documentation, showing you how to perform the different actions that the API allows - GET, POST, PATCH and so on. API documentation sometimes takes a bit of time to get used to, but most APIs follow the same conventions. If you’re new to APIs, stick with it - it will make sense!
Trello’s API for creating a card tells us a few things:
- it needs to be a
POSTrequest - we
POSTdata to this urlhttps://api.trello.com/1/cards?idList=with your unique list ID after the=sign - we need to pass a header of
'Accept: application/json' - we can URL parameters to pass other information in the request, card name for example.
Trello’s documentation also notes that we need to pass an API key and a token to authorise the request. We won’t cover the process of getting your key and token in this post, but generally, most APIs need keys or tokens on each request to ensure that the sending app has the appropriate permission to complete the requested action.
From this, we can start to form the URL we need on construct on the API request:
'https://api.trello.com/1/cards?idList=YOUR-LIST-ID&name=THE-TASK-NAME&key=YOUR-API-KEY&token=YOUR-TOKEN'
Let’s add some variables to our script to hold the key, token and list id and then build the URL with these variables:
const LIST_ID = '61feac684567891289df2'
const API_KEY = 'aac7c3054898g98ssso8744dea6d'
const TOKEN = '7effe4354898229805980fdkhskwjgh5989ec88e3'

let tasksT = base.getTable('Tasks')
let tasksQ = await tasksT.selectRecordsAsync({
    fields: ['Name']
})
for (let task of tasksQ.records) {
    console.log(task.name)
    let url = 'https://api.trello.com/1/cards?idList=' + LIST_ID + '&name=' + task.name + '&key=' + API_KEY + '&token=' + TOKEN
    console.log(url)
}
Run this script and log the URL to check that it all looks good. One thing that you might spot is spaces in the URL (from the spaces in the task name):

We don’t want spaces in the URL, so we can “URL encode” the task name to appropriately encode the spaces. Change the URL to this:
let url = 'https://api.trello.com/1/cards?idList=' + LIST_ID + '&name=' + encodeURIComponent(task.name) + '&key=' + API_KEY + '&token=' + TOKEN
and run the script again - you should notice that the spaces have gone from the URL:

We can now add the fetch API call to our script which executes on each iteration of the for loop.
const LIST_ID = '61feac684567891289df2'
const API_KEY = 'aac7c3054898g98ssso8744dea6d'
const TOKEN = '7effe4354898229805980fdkhskwjgh5989ec88e3'

let tasksT = base.getTable('Tasks')
let tasksQ = await tasksT.selectRecordsAsync({
    fields: ['Name']
})
for (let task of tasksQ.records) {
    console.log(task.name)
    let url = 'https://api.trello.com/1/cards?idList=' + LIST_ID + '&name=' + encodeURIComponent(task.name) + '&key=' + API_KEY + '&token=' + TOKEN
    console.log(url)
    let response = await fetch(url, {
        method: 'POST',
        headers: {
            'Accept': 'application/json'
        }
    })
}
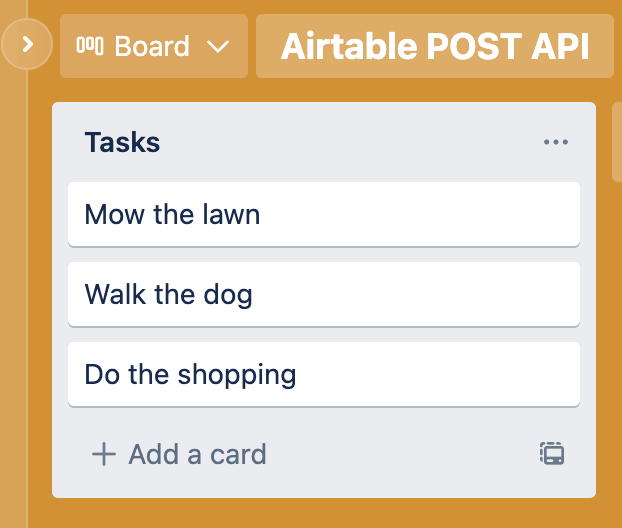
Run the script again and you will see 3 cards appear on your Trello board.
Other tips for POST requests
Different APIs work in different ways, so depending upon where you want to send your data the request you form in your script might be different.
- Data - in our example the data we passed to Trello was in URL parameters. Some APIs will require you to pass a data object in the
body. This would look something like this:
let data = {
    id: 'your id'
    task: 'task name',
    description: 'task description'
}
let response = await fetch(url, {
    method: 'POST',
    headers: {
        'Accept': 'application/json'
    },
    body: JSON.stringify(data)
})
- API keys can also be passed in the
fetchheader options.
let response = await fetch(url, {
    method: 'POST',
    headers: {
        'Accept': 'application/json'
        'Authorization': 'Bearer YOUR_API_KEY'
    },
    body: JSON.stringify(data)
})
Note that the API keys used in the scripts above are fake and can’t be used with Trello’s API 😀.
See APIs Part 1 and APIs Part 3 for more in this series.