REST APIs and Airtable (APIs Part 1)
For many Airtable use cases, Airtable is the only thing you need. A few tables and views, a couple of forms, maybe an automation or two and, of course, some scripts and you’re all set. You don’t need to have anything else in your kitbag to make it work.
But sometimes we want Airtable to work with another app. You might want to copy your projects to Asana, send an email using Sendgrid or get the latest stock prices. To get Airtable and another app to “talk” we’re going to need to use APIs. Most modern web apps have APIs and the most common design pattern for an API is REST (or RESTful).
This is part 1 of a series of posts that will explore how Airtable can interact with REST APIs to get, create, update and delete data in other applications.
We’re going to start by getting some data from an external API and using it to create records in Airtable. We could connect to a specific app to do this, but we’re going to user JSONPlaceholder, which is a fake API resource, as our API provider, taking the place of the web app we want to integrate with.
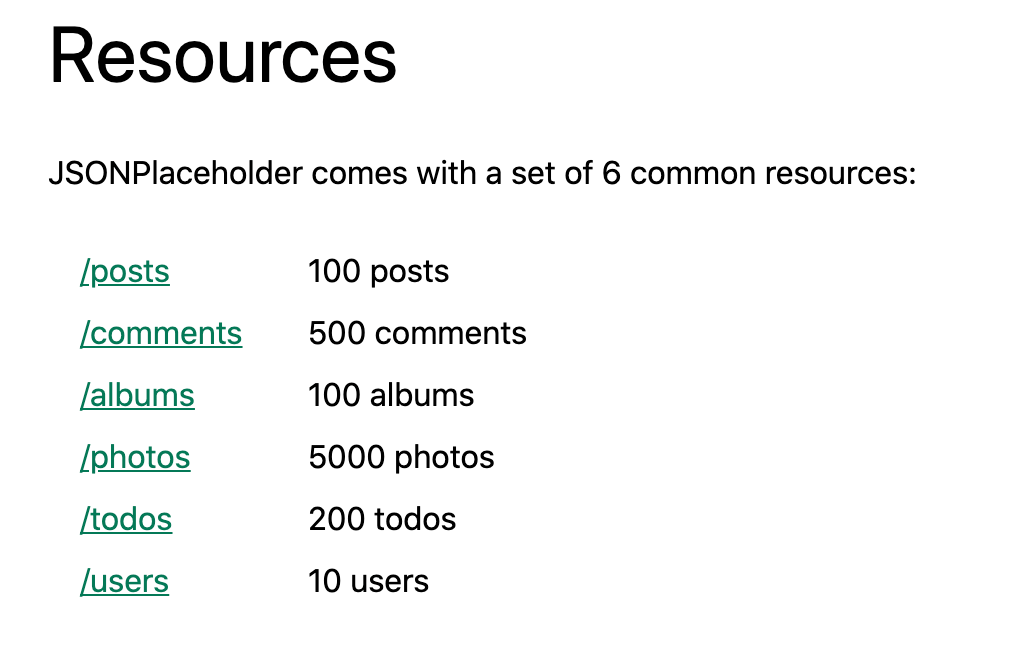
We’ll start by looking at what JSONPlaceholder can give us. Scroll down the JSONPlaceholder homepage and you’ll see a list of common resources that it provides:
Click on the /posts link and you’ll see a page of post data in JSON format. A couple of points to note at this stage:
- The data returned is an array (square brackets at the start and end)
- The array is a series of objects (denoted by a pair of curly brackets containing a series of key/value pairs.)
Typically a REST API will present multiple instances of the requested resource as an array of objects (like posts above). You can usually request a single, specific record and this will be presented as a single object (Example here).
The structure of each object record in the array is pretty straightforward:
{
  "userId": 1,
  "id": 1,
  "title": "sunt aut facere repellat provident occaecati ...",
  "body": "quia et suscipit\nsuscipit recusandae consequuntur ..."
}
We have:
- The
userId- a non-unique value in the posts collection (a user might have many posts) - The
idwhich is the unique identifier for the record - The
title-the title of the post - The
body- the content body of the post
Let’s create a table in Airtable with the same structure to hold the data.
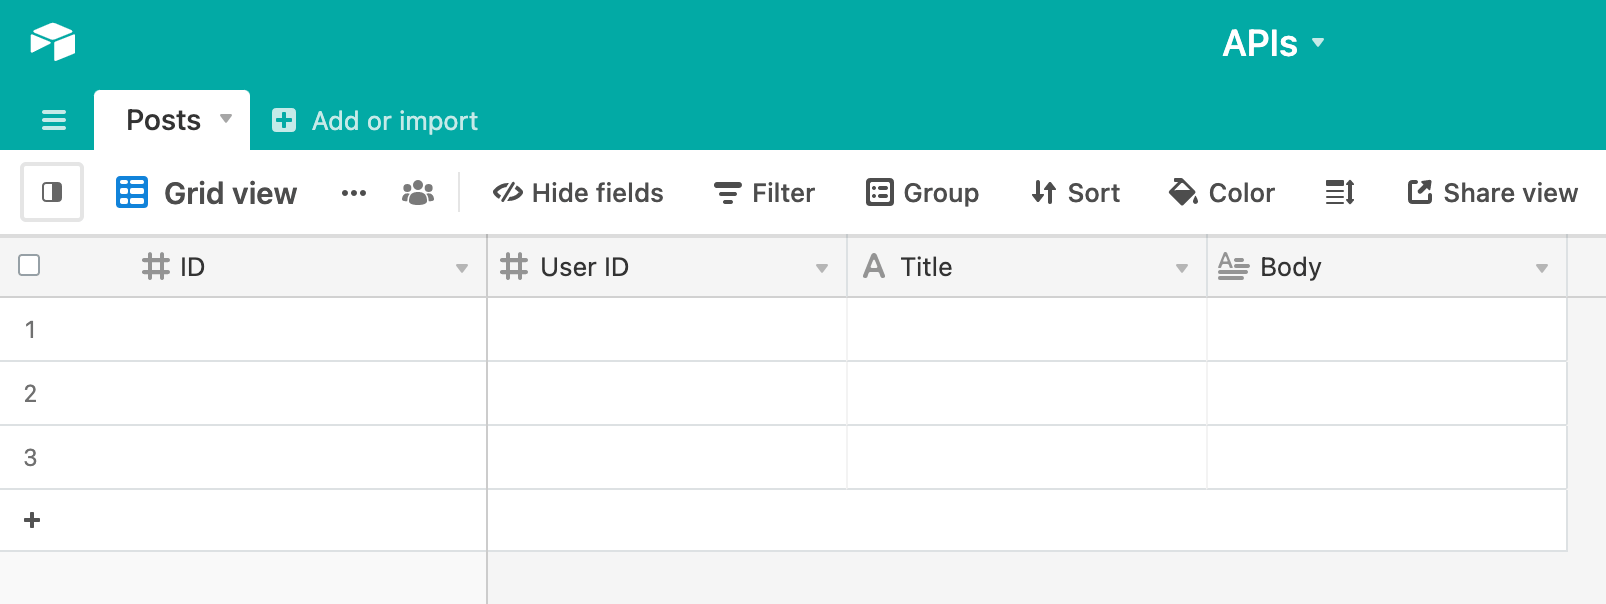
Notice that we have changed the order in our table to make the post id the primary field. When working with APIs field order is usually not relevant - we’re not mapping field one in our API to field one in our table. We usually map by field name (API id maps to table ID, for example), so the order that the fields are presented to us by the API compared to the order of fields in our table doesn’t matter.
So, we’ve looked at the data that our API gives us and we have a table in our base to hold the data. Our next step is to use an Airtable script to get the data and then insert it into our table. Let’s add scripting app to out base and start coding.
We’re going to use JavaScript’s fetch methods for our script. fetch allows us to make http calls to web servers, getting a document or data in return. The default method for fetch is GET - getting data from a resource. We’ll see later in this series that there are other methods we can use with fetch to create, update, delete and more.
To start our script, we’re going to fetch data from JSONPlaceholder posts url and assign the response we get to a variable:
let apiResponse = await fetch('https://jsonplaceholder.typicode.com/posts');
The apiResponse variable has a number of methods we can access and, as we’re fetching JSON data, we’ll use the .json() method to do something with our data.
let apiResponse = await fetch('https://jsonplaceholder.typicode.com/posts');
let data = await apiResponse.json();
console.log(data)
Here, we assign the parsed JSON data to the variable data, then log this to the console. Run your script and you should see something like this in the output panel.
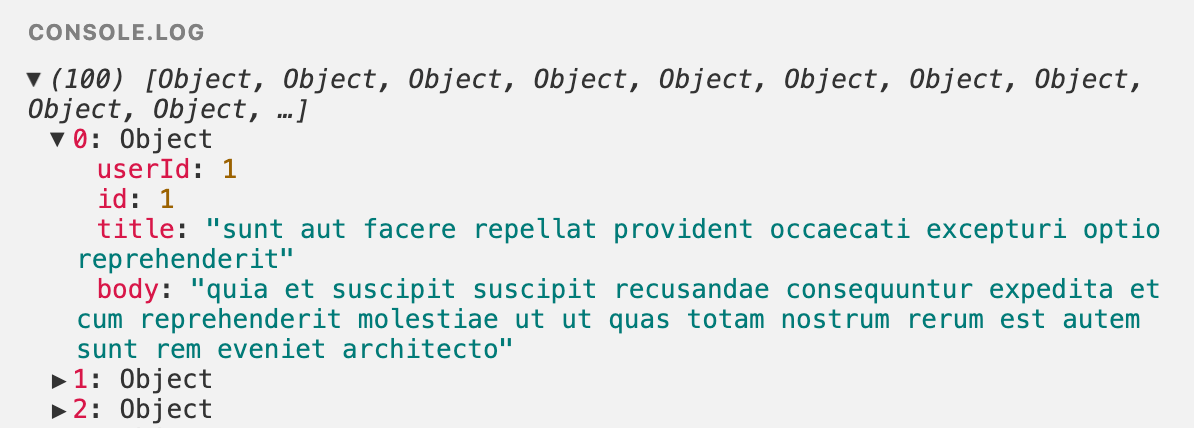
We have an array of 100 post objects and if we expand the first object we can see the userId, id, title and body of the first post. Success! We’ve got the data from the remote app and made it available to our script.
Our next step is to iterate through the array of data and create a record in our base from each table. Add this code to the bottom of your script.
let postsT = base.getTable('Posts');

for (let post of data) {
    output.text(`Creating post ID ${post.id}`)
    await postsT.createRecordAsync({
        'ID': post.id,
        'User ID': post.userId,
        'Title': post.title,
        'Body': post.body
    })
}
We start by defining the posts table. We then do a for ... of iteration to loop through each record of the posts array we have already fetched. For each post we output some text to show which record is being created and then use Airtable’s createRecord method to create a new record.
Note how the posts data from the fetch is mapped to our table. As we iterate, each element of the data array is assigned to the post variable in turn. We then use the “dot” notation to access the attributes of the current post - post.id, post.userId and so on. Each of these attributes is mapped to the appropriate table field - 'ID': post.id.
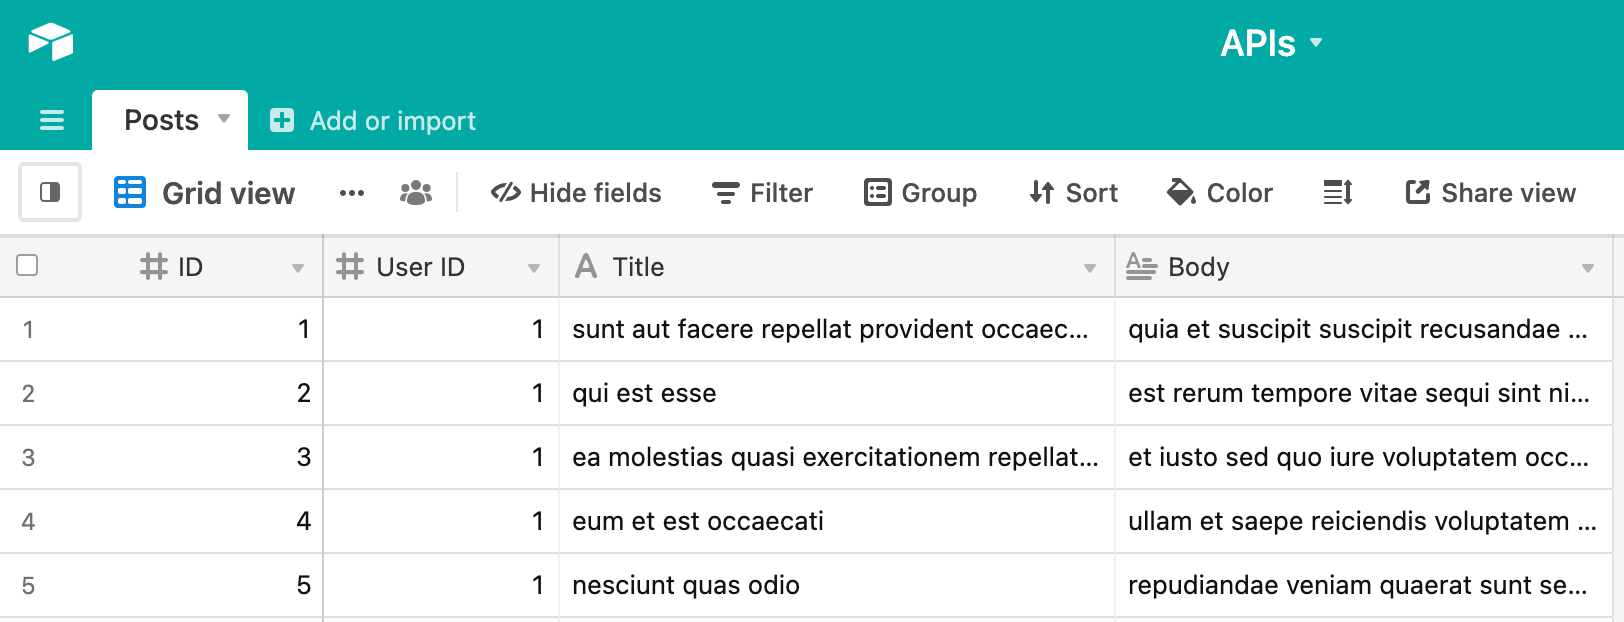
Run the script and return to your table and you should see something like this:
👍
This is step 1 on the API journey - we’ll extend this example further during this API mini-series to show more complicated scenarios with real APIs, different REST actions and more.
See APIs Part 2 and APIs Part 3 for more in this series.